If you want to host and playback video on your Drupal site, it’s a good option to use Amazon Simple Storage Service to store those video files. S3 is cheap, fast and scalable.

Drupal and it’s modules can be somewhat buggy, and some of the support articles aren’t exactly beginner friendly, so setting it up can be a pain. I’ve made a tutorial that should save you the hours of tinkering and Googling that I had to do.

1. Pre-installation.

I’m going to assume you have Drupal 7 already setup. I’m using VDD for my Drupal environment, version 8.x-1.0-alpha4. Note that if you’re using a local development environment, you’re going to have to ensure your router can forward incoming internet traffic to your local web server, for reasons which will become apparent later. I’ve got another post on that if you aren’t sure how to do it.

You’re also going to need a few things installed on your server. Tutorials are available for these installations elsewhere if you need them:

  • Git
  • Libraries module
  • Drush

2. Install Zencoder

Zencoder is a cloud-based file encoding service. When you upload videos to your site, you’ll want to encode them in a uniform format before making them available for viewing. Zencoder is free to try, but prices begin at around $0.05 per minute of video converted if you don’t want a watermark on your videos.

Open a terminal window, and install the Zencoder API:

drupal7$ mkdir sites/all/libraries/zencoder
drupal7$ cd sites/all/libraries/zencoder
drupal7/sites/all/libraries/zencoder$ git clone https://github.com/zencoder/zencoder-php.git .

(drupal7 is the assumed name of the root directory of your site)

After installing the Zencoder API you may need to clear cache and run cron to get Drupal to notice this installation has taken place:

drupal7$ drush cc
drupal7$ drush cron

3. Install Drupal Video module

Next, install and enable the Drupal Video module:

drupal7$ drush en video -y

Now back over to the browser. Go to admin/modules and enable the Video UI and Zencoder as well:
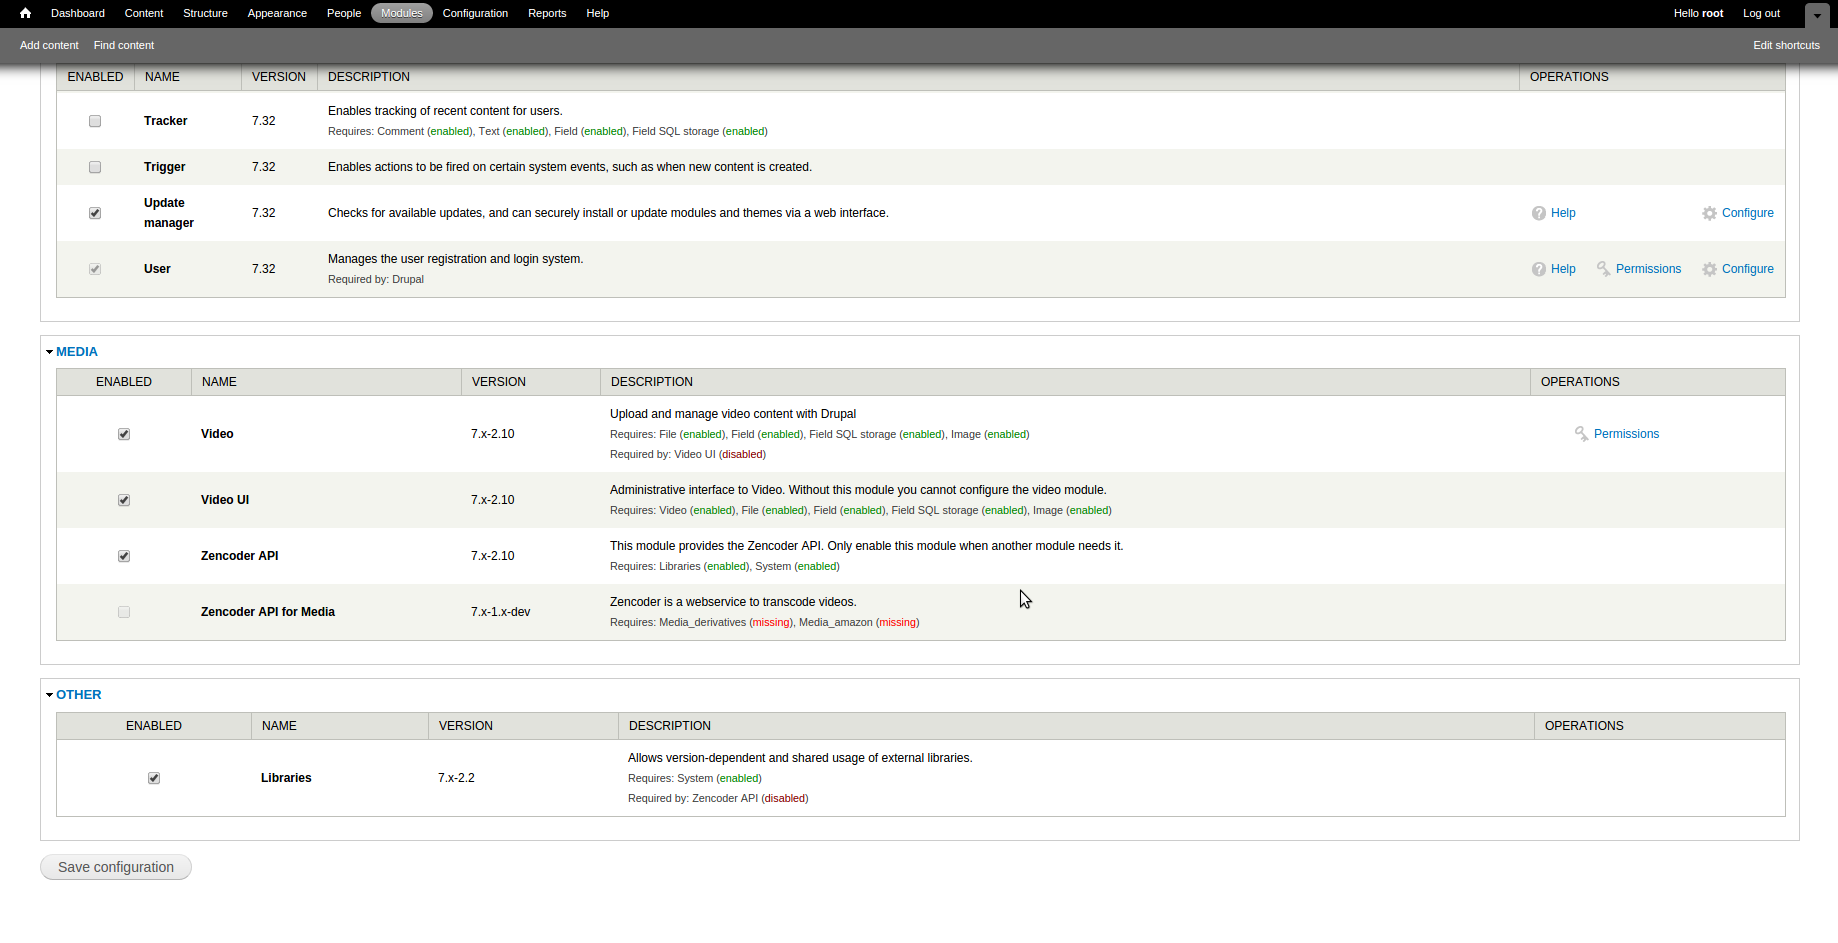
Screenshot

Save configuration.

Through admin/config/media/video/transcoders, enable Zencoder as the video transcoder. It’ll ask for your email address and ultimately for you to setup an account. Do so.

You’ll also need to make sure you set a valid Postback URL here. This allows the Zencoder API to report back to Drupal with the outcome of the video conversion process. If you’re developing locally, like I am, you’ll need to setup port forwarding here to be able to receive the POST. You may also need to change the video scheduler location, otherwise Zencoder may report a problem like “Couldn’t find http://default.com..”. You can use Drush for this:

drupal7$ drush video-scheduler --uri=http://yoururl.com

Now we’ll setup the Video module. Create at least one preset at admin/config/media/video/presets/add. Configure this however you like.

Now add a new content type at admin/structure/types. Call it Video or whatever you like, though I’ll be referring to it as Video throughout this article. Again, you can change all the settings on this page if you like, or leave them as default.

Go to Save and add fields.

Add a field with field type Video. I’ve called it File, but again, you can call it what you like.
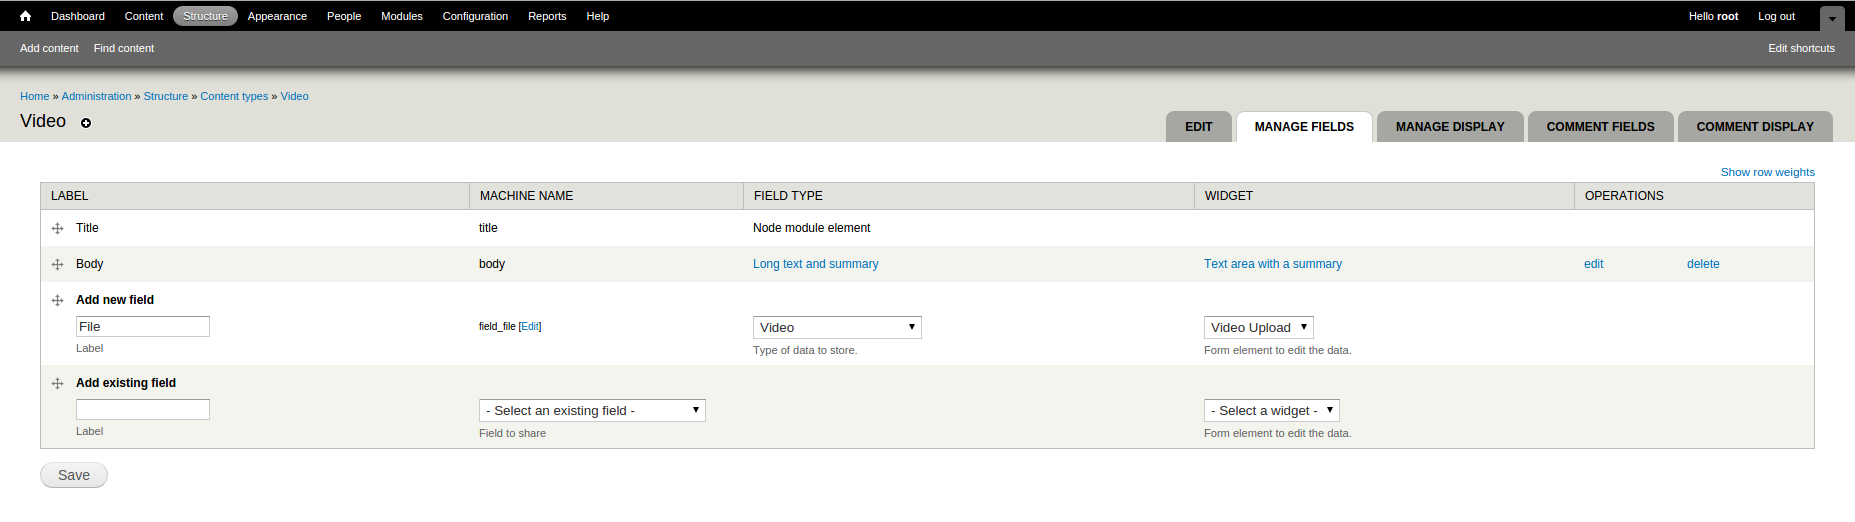
Screenshot

Click Save.

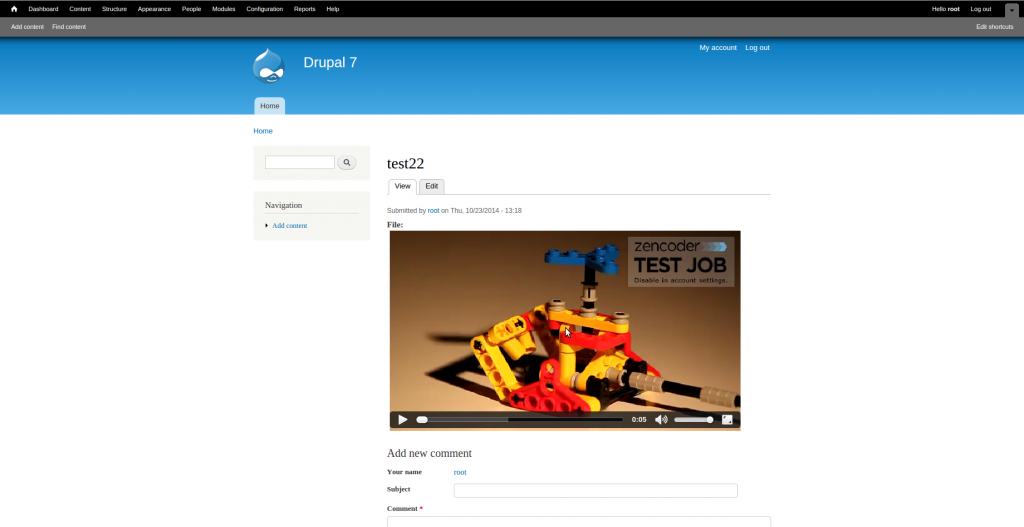
Now you’ve got video content setup on your site. If it worked, you should be able to go to Add Content > Video and create a new node with your video content. Try it out. If you need a sample video clip to test with, try this. After you’ve added the node, you should see a message at the top saying the video has been queued for conversion.

Screenshot

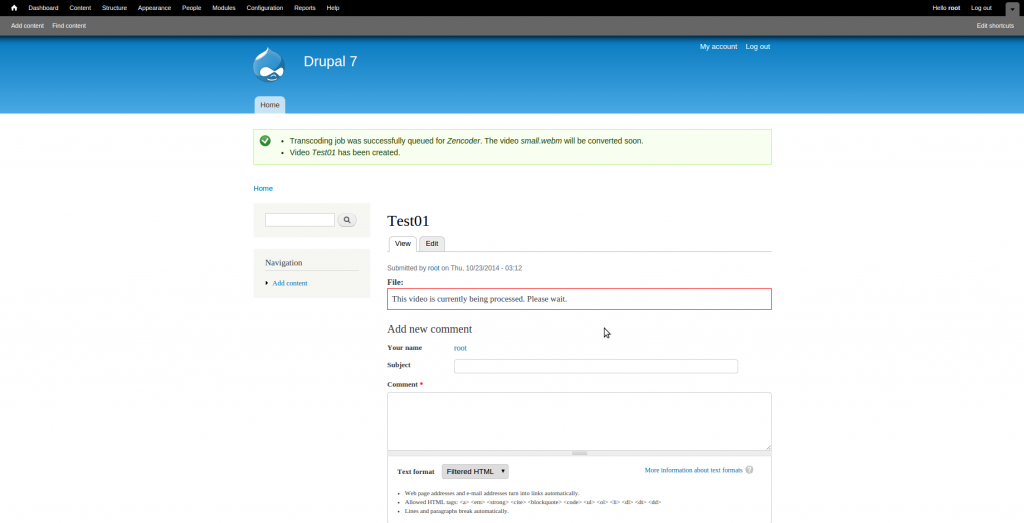
Your video will hopefully have been submitted to Zencoder, and in a few minutes, should appear on your node fully transcoded.

Screenshot

If there are any issues, you can go to your Zencoder account and see if the conversion process has worked. The API requests page is quite useful for debugging.

Screenshot

4. Setup an S3 bucket

So now we have video the uploading and converting to the site. If you just have a few videos and not much traffic to your site, this might be an adequate solution. But if you expect a decent amount of traffic, it’s a good idea to use file stoarge such as S3.

Let’s now setup an S3 bucket. If you haven’t already, sign up to AWS.

Firstly, we’ll need to create a user on AWS. This user will be employed by your Drupal site, to give it access the S3 bucket. We can set permissions for the user to limit what it can do, in case someone hacks your site. So go to Console > IAM > Users > Create New Users. Create a new user and be sure to make note of the Access Key ID and Secret Access Key. You’ll need these. Also, get the User’s ARN from the Summary, once the user is created.

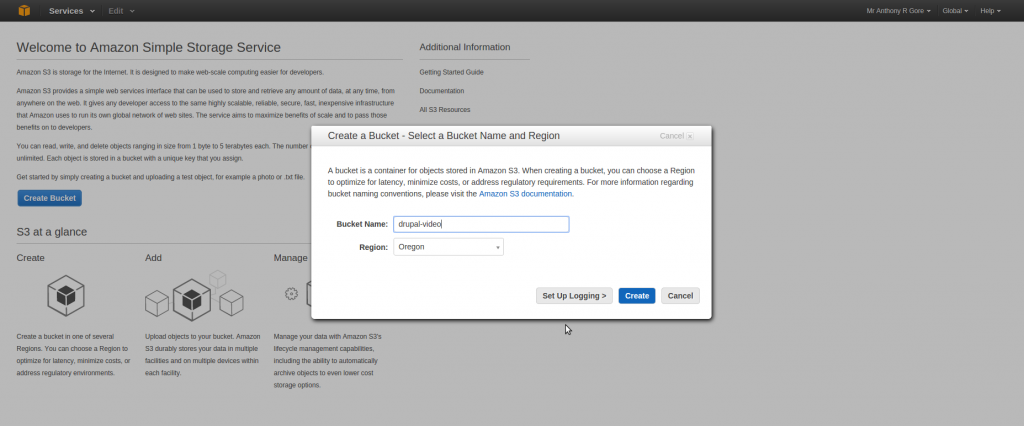
Now let’s create a bucket to store the video files. Go to Console > S3 and setup a new bucket. Call it whatever you like, I called mine drupal-video.

Screenshot

Select the new bucket, then go to Permissions > Edit bucket policy. Here we will set the permissions for to this bucket. You need to give permissions to both your user you just created, and to Zencoder, as both will need to read and write to the bucket. The below policy is a modified version of the sample policy provided by Zencoder. Replace anything in < > with the information specific to your account.

[
   {
      "Version": "2008-10-17",
      "Id": "ZencoderBucketPolicy",
      "Statement": [
         {
            "Sid": "Stmt1295042087538",
            "Effect": "Allow",
            "Principal": {
               "AWS": [
                  "arn:aws:iam::395540211253:root",
                  "<your-user-ARN>"
               ]
            },
            "Action": [
               "s3:GetObjectAcl",
               "s3:GetObject",
               "s3:PutObjectAcl",
               "s3:ListMultipartUploadParts",
               "s3:PutObject"
            ],
            "Resource": "arn:aws:s3:::<your-s3-bucket>/*"
         },
         {
            "Sid": "Stmt1295042087538",
            "Effect": "Allow",
            "Principal": {
               "AWS": [
                  "arn:aws:iam::395540211253:root",
                  "<your-user-ARN>"
               ]
            },
            "Action": [
               "s3:ListBucketMultipartUploads",
               "s3:GetBucketLocation"
            ],
            "Resource": "arn:aws:s3:::<your-s3-bucket>"
         }
      ]
   }
]

Your bucket is now setup. You’ll now need to set a policy for the user you created as well, which defines the permissions this user has. We didn’t set this before because we hadn’t yet created a bucket. So go back to Console > Users, select the user you created, and go to Policies > Attach Policy. Here’s a sample policy, you’ll need to replace with the name of your S3 bucket.

{
   "Statement": [
      {
         "Sid": "DrupalVideoUserPolicy",
         "Action": "s3:*",
         "Effect": "Allow",
         "Resource": "arn:aws:s3:::<bucket>"
      }
   ]
}

5. Setup AmazonS3 module in Drupal

Now we’ve setup AWS sufficiently. Return the terminal and let’s install the AmazonS3 module for Drupal with Drush:

drupal7$ drush en amazons3 -y

Now install the AWS SDK for PHP into the Libraries directory:

drupal7$ cd sites/all/libraries
drupal7/sites/all/libraries$ mkdir awssdk
drupal7/sites/all/libraries$ cd awssdk
drupal7/sites/all/libraries/awssdk$ git clone https://github.com/amazonwebservices/aws-sdk-for-php.git .

Now clear cache for changes to be noticed in Drupal

drupal7$ drush cc

Returning to the browser, go to admin/modules and activate AWS SDK for PHP UI.

Screenshot

Now go to admin/config/media/amazons3 and enter your bucket name

Screenshot

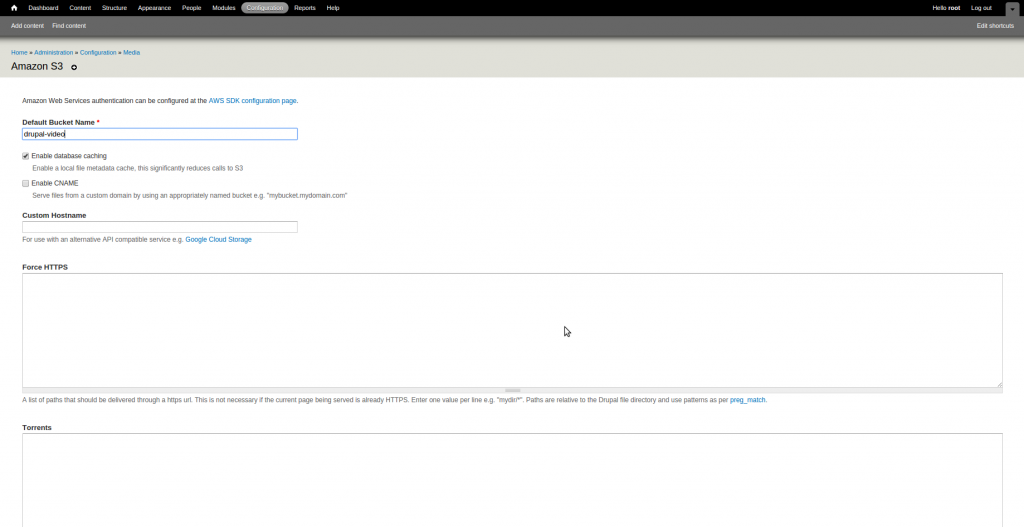
Save changes, and go to admin/config/media/awssdk. This is where you will put in your AWS user info, so Drupal can access your bucket. Enter your Key ID and your Secret Key, and Save Configuration.

6. Finishing up (almost)

Now Drupal has a connection to your S3 bucket. We have to tell it now to store video files in the bucket we’ve setup, and we’ll be (almost) done.

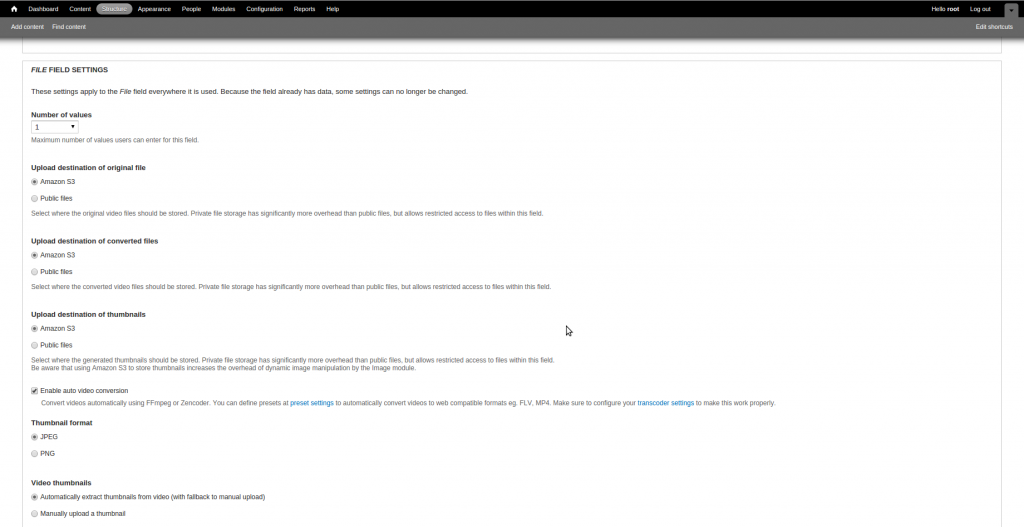
Go to admin/structure/types to edit your Video content type. Click manage fields. Find the field you added previously, I called mine File. Under Operations, click edit.

Now scroll down to the field settings. You should be able to change the destinations of the uploaded files to Amazon S3. Do so, and save changes.

Screenshot

7. Fix bug #1:

This, theoretically, is all you need to do. But if you go ahead and try and add content, you’ll likely get this error from Zencoder: “Input media file url of input file is not well formed. Please confirm that it is a valid URL.”

If you don’t get this error, great, but if you do, it’s because of a bug in the current release of the AmazonS3 module, as documented here.

I’ve created a patch for it which you can easily apply to the S3 module. I should note, though, at the time of writing, this patch has not been verified, so use it at your own risk.

Return to the terminal and cd into your amazons3 module directory:

drupal7$ cd sites/all/modules/amazonS3
drupal7/sites/all/modules/amazons3$ wget https://www.drupal.org/files/issues/amazons3-malformed-url-2207865-0.patch
drupal7/sites/all/modules/amazons3$ patch < amazons3-malformed-url-2207865-0.patch
drupal7/sites/all/modules/amazons3$ drush cc

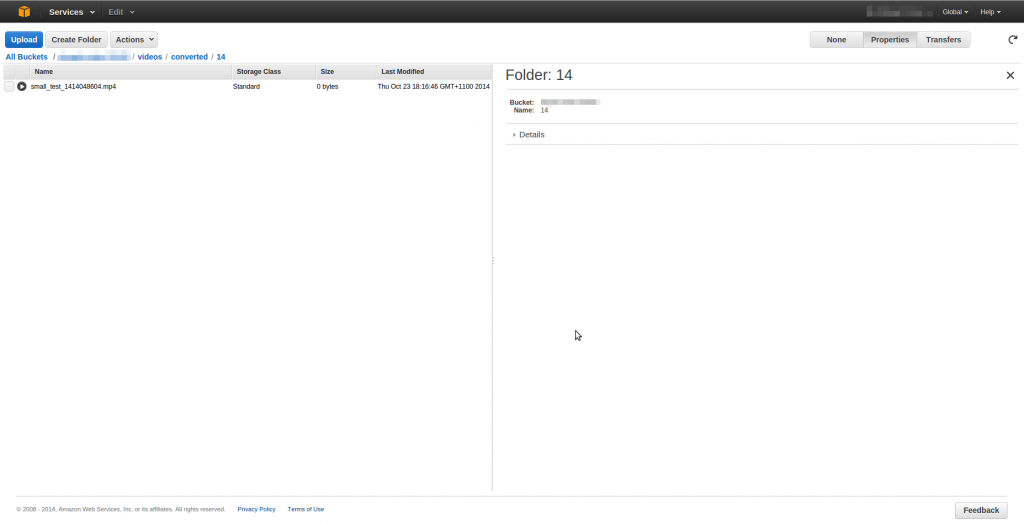
Now try add a video node. Go to your bucket and see if the video uploaded/converted:

Screenshot

8. Fix bug #2:

As if that weren’t enough, there’s a bug in the current version of the video module which shows up when using AmazonS3. It’s detailed here.

You may be subject to this bug if all the following apply after you attempt to add a video node:

  • Zencoder returns a positive response,
  • You can see the video and thumbnails converted in S3
  • You get this error “The video conversion process has failed. You might want to submit a simpler video format like mpeg or divx avi.”

You can patch it as follows:

drupal7$ cd sites/all/modules/video
drupal7/sites/all/modules/video$ wget https://www.drupal.org/files/issues/conversion-failed-1991534-49.patch
drupal7/sites/all/modules/video$ patch < conversion-failed-1991534-49.patch
drupal7/sites/all/modules/video$ drush cc

9. Actually finished

As you’ll see in the screen shot below, it took me 22 attempts to get the process working correctly. But despite the required patience, it’s a quite a solid solution for hosting video.

Screenshot


One of the problems when putting your WordPress project under version control is that the files alone are somewhat meaningless without the database. You can’t really rollback to a previous commit and expect it to work if the database has changed.

One possible solution is to put your database under version control as well. An easy way to do it is to put a bash script in your root folder like this:

#!/bin/bash
USER="wordpress"
PASS="wordpress"
DB="wordpress"
mysqldump -u $USER -p$PASS $DB --add-drop-table > dbbackup.sql

Save the file as dbbackup.sh and you can simply run ./dbbackup.sh before git add when you’re about to stage and commit your files. This will mean your repository is a snapshot of the whole WordPress project, not just the files.

You can also create a script to restore the database. Save this as dbrestore.sh and run it after a git pull:

#!/bin/bash
USER="wordpress"
PASS="wordpress"
DB="wordpress"
mysqlimport -u $USER -p$PASS $DB dbbackup.sql

Vagrant

If you use Vagrant, which I recommend, you’ll need to login to the guest box to do the database dump, otherwise the script will think you’re trying to run mysqldump from the local MySQL. This will do the trick:

#!/bin/bash
vagrant ssh -c '
USER="wordpress"
PASS="wordpress"
DB="wordpress"
mysqldump -u $USER -p$PASS $DB --add-drop-table > /var/www/anthonygore.com/public_html/dbbackup.sql
'

vagrant ssh -c '' will run the command(s) inside the quotes from your vagrant box’s terminal.

Security

I also put the following in my .htaccess file, to ensure, if the database backup gets deployed to a production server, that no one can open these files via the browser. Correct file permissions will do the job, but those tend to go awry when git’ing.

<FilesMatch "(dbbackup\.sql|dbbackup\.sh|dbrestore\.sh)$">
    Order Allow,Deny
    Deny from all
</FilesMatch>

It’s generally considered a best practice to develop a WordPress site (or any site, for that matter) in a “development” environment i.e. own your own computer, and transfer the completed site to the “production” environment i.e. the site’s permanent home.

But what if you want to show your in-development site to your client, co-workers etc. who may not be on-site to look at your computer? You can expose your local installation to the internet, using your own computer as a server.

Assuming you’ve already installed WordPress on your local machine with WAMP, MAMP etc, the steps for putting it online are as follows:

  1. Identify your local and global IP
  2. Unblock port 80
  3. Setup your router to forward internet traffic to your site
  4. Setup WordPress to work correctly whether viewed either locally or remotely

1. Identify your local and global IP

There are two separate IP addresses that will be relevant to this setup: the IP address assigned to your router by your ISP (i.e. your global IP) which is the IP used to send/receive information on the internet, and the IP assigned to your computer by your router (your local IP) which is the IP used to send/receive information on your local network.

To identify your global IP, you can just Google “what is my IP” and Google will tell you. Easy.

Note: often your global IP will be dynamic i.e. it changes every time your router connects to the internet via your ISP. This is a problem because other people on the internet won’t know where to find you next time you disconnect and reconnect, as you’ll have a new global IP. Consider contacting your ISP and asking for a static IP which does exactly what you’d expect – remain constant. My ISP offers the service for $10/month. If you proceed with a dynamic IP, you’ll have to change your settings every time you disconnect/reconnect and inform anyone who wants to visit your site, which will be a pain.

The method for identifying your local IP will depend on your operating system, so use Google to find the appropriate method of identifying it.

2. Unblock port 80

Port 80 is the internet port that web traffic uses. Typically your router (and possibly your ISP) will block incoming traffic to this port because most people don’t need to allow incoming traffic from the internet to their local network, and it’s safer just to keep it blocked.

To see if your port 80 is blocked, use this tool:

http://www.yougetsignal.com/tools/open-ports/

Enter your global IP and 80 as the port. If it’s blocked, go to your router’s admin page and find the security or firewall settings. I don’t recommend turning off the firewall entirely, but usually you can set up a rule to allow traffic just on port 80. Consult your router’s manual for instructions on how to do that.

You may also need to contact your ISP, as they’ll often block port 80 unless you request to have it unblocked.

3. Setup your router to forward internet traffic to your site

Now you’ve unblocked port 80, and you give someone your global IP and they put it into their internet browser. Still nothing happens. How do you make it so that an internet browser making a request to your global IP will return your locally set up WordPress site?

Firstly, you need to set up port forwarding. Remember it’s your router that has the global IP, not your computer. So right now when people enter your global IP their being directed to the router, which obviously doesn’t have a web page etc to respond with.

You just need to tell your router to forward any traffic on the web from port 80 to your computer. The method for doing this is largely dependent on the model of your router, so you’ll need to ask Google again or consult your router’s manual. Here’s the rough concept so you know what to look for:

  1. Enter your router’s admin page on the local network
  2. Find the section on Port Forwarding
  3. Forward traffic on port 80 of the router to port 80 on your computer (this is where your local IP will be needed). The setting will most likely look like this:Source IP: any. Source port: 80. Destination IP: . Destination port: 80. Protocol: TCP.

Now, when someone enters your IP in their browser, the request will travel to your router, pass the firewall, and your router will now forward that your computer.

4. Setup WordPress to work correctly whether viewed locally or remotely

If you’ve installed WordPress on your local machine, you’re most likely able to view it in your browser at localhost or localhost/mysite etc. But a remote viewer will not be viewing at localhost, they’ll be viewing via your global IP

The problem is that by default, WordPress usees absolute URLs. You’ll probably know that many files loaded by WordPress will look like this on your local installation:

<img src="<a href="http://anthonygore.com/path/to/media.jpg">http://anthonygore.compath/to/media.jpg</a>"/>

This is fine when viewed on your local machine, but when someone views the same page online, that image won’t show because “localhost” on their machine is not the same as locahost on your machine.

So couldn’t couldn’t you just change your URL’s to your global IP like the following?

<img src="<a href="http://anthonygore.com/path/to/media.jpg">http://59.167.3.220/path/to/media.jpg</a>"/>

No, the problem with that is your browser will route the request for that image out onto the internet and back to your machine, pointlessly taking additional time to load the image.

The solution is to use relative URLs instead of absolute URLs like those above e.g.:

<img src="/<a href="http://anthonygore.compath/to/media.jpg">path/to/media.jpg</a>"/>

You need to make some changes to your site for this to work, though. Note this should only be done on a development server, don’t do this in production as it can have other negative consequences.

Firstly, add the following to your index.php file:

$your_ip = "59.167.3.220"; // change this to your global IP
if ($_SERVER['SERVER_NAME'] == $your_ip) {
    define('WP_HOME', $your_ip);
    define('WP_SITEURL', $your_ip);
}

This means that if someone is requesting your site via your IP, WordPress will use it as the site URL. If not, it will stick with the default (i.e. localhost).

You’ll also need to install plugins to ensure WordPress knows to use relative URLs. Try these:

https://wordpress.org/plugins/relative-url/

https://wordpress.org/plugins/relative-image-urls/

If you’re applying this to an existing site, you might have some hard-coded links you’ve added which may have to be changed manually, so ideally you want to set the above up before you’ve started working on the site.

Now your clients, co-workers etc should be able to view your WordPress site, just as you do, through http://your-global-ip.

If you want to go a step further, you can even assign a domain name to your global IP. For example, http://www.yourname.com/test. That’s a topic for another post.


This tutorial assumes knowledge of:

  • Corona SDK
  • Tiled Map Editor

Here’s a short video of the game:

Corona isometric puzzle game

A critical aspect of isometric games is the ordering within the display group. For example, if one block is “farther away” in terms of map perspective, another block that overlaps this block should be displayed in front of it, to maintain the 3D illusion. You can do this by changing the ordering of display group objects. This concept is explained further in the Corona docs

In isometric perspective, the concept is this: objects that are “nearer” are lower on the screen, and should be at the front of the display group. Object that are “farther” are higher on the screen, and should be at the back of the display group.

Let’s assume your blocks are in a table block. The below function will re-order them (not in the table, but the display group) by calling the method toFront() on each object:

function reorderDisplay()
 
    --Put the blocks into an ordered table
    local ordered = {}
    for i = 1, #block do
        table.insert(ordered, block[i])
    end
 
    --Arranges the blocks based on the smallest y value
    table.sort(ordered,
    function(a, b)
        return a.y < b.y
    end)
 
    --Inserts the blocks into the display group in that order i.e. the
    --smallest goes in first, the largest goes in last.
    for i = 1, #ordered do
        ordered[i]:toFront()
    end
end

The function firstly puts the blocks into a new table ordered. It then sorts the table with the Lua function table.sort(), which can have a sorting function passed as it’s second parameter. The function I’ve provided compares the y property of each object to order them smallest to largest.

Once sorted, simply call toFront() on each object. Since they’re sorted smallest to largest by their y property, the nearer objects will be displayed in front

In this game, I call the reorderDisplay() function in the game loop, but only if a block is moving. That way, any time a block passes another, Corona can figure out which order they should be in. If you don’t call this function, the 3D illusion is lost.

function onEveryFrame (event)     
    --Check if it needs to reorder the block display
    for i = 1, #block do
        if block[i].moving == true then
            reorderDisplay()
        end
    end
end

This tutorial assumes knowledge of:

  • Corona SDK
  • Tiled Map Editor

Here’s a short video of the game:

Corona isometric puzzle game

In part 2 of the tutorial I showed how to load your map into a Corona project. In part 3 and 4 I’ll show you some elements of the game logic. I’m going to restrict the discussion to aspects of the game logic that are affected by the isometric perspective of the map.

Let’s firstly look at how to move the blocks on the isometric map. We’ll then discuss display ordering.

Here’s the function that handles block movement. In a nutshell, you provide the function with the angle the D-pad touch listener calculated, and which block was selected. The function will figure out where the block should end up (given the positions of the other blocks on the map), then transition the block from it’s current position to the new position.

--Moves a block. angle is the movement angle (sent from the D-pad)
--i is the selected block
function moveBlock(angle, i)
    --i.e. if a block is indeed selected
    if i > 0 then
        --Variables
        local deltaX, deltaY, newTilePosX, newTilePosY, iTileX, iTileY,
        moveScreenPosX, moveScreenPosY, newScreenPosX, newScreenPosY,
        deltaTilePosX, deltaTilePosY, timeScale
 
        --Arrays
        local jArr = {}
 
        --Only move if the block is not already moving
        --You don't want to interrupt a current movement
        if not block[i].moving then
 
            --Get directional change
            --angleToDir function not shown, it returns the change
            --in x and y axis represented by the angle argument
            deltaX, deltaY = angleToDir(angle) 
 
            --Get tile position of current block
            iTileX, iTileY = block[i].tileX, block[i].tileY
 
            --Get tile position of the other blocks
            for j = 1, #block do
                if j ~= i then
                    table.insert(jArr, { tileX = block[j].tileX,
                    tileY = block[j].tileY})
                end
            end
 
            --Calculate new block position
            --newBlockPos (not shown) will calcalaute the new tile position
            --of block i, given the positions of the other blocks
            newTilePosX, newTilePosY = newBlockPos(iTileX, iTileY, jArr,
            deltaX, deltaY)
 
            --Change in block position
            deltaTilePosX, deltaTilePosY = newTilePosX - iTileX,
            newTilePosY - iTileY 
 
            --See if new position is viable i.e. on the map
            if (newTilePosX >= 0 and newTilePosX < (mapWidth - 1)) and
            (newTilePosY >= 0 and newTilePosY < (mapHeight - 1)) then                             --Update tile position
                block[i].tileX, block[i].tileY = newTilePosX, newTilePosY                         --Calculate new screen position of block i
                moveScreenPosX, moveScreenPosY = (deltaTilePosX - deltaTilePosY) *                tileWidth/2, (deltaTilePosX + deltaTilePosY) * tileHeight/2                       newScreenPosX, newScreenPosY = block[i].x + moveScreenPosX,
                block[i].y + moveScreenPosY
                --Set the block to moving
                block[i].moving = true
                --Update screen position with a transition
                local function listener (event)
                    block[i].moving = false
                    if moveScreenPosX == 0 and moveScreenPosY == 0 then
                    else
                        audio.play(blockClick)
                    end
                    --Check if the game's been won
                    checkWon()
                end
                if math.abs(deltaX) > math.abs(deltaY) then
                    timeScale = math.abs(deltaTilePosX)
                else
                    timeScale = math.abs(deltaTilePosY)
                end
 
                transition.to(block[i], {time=timeScale*100,
                transition=easing.outQuad, x = newScreenPosX,
                y = newScreenPosY, onComplete = listener}
                )
            end
        end
    end
end

In the next tutorial we’ll look at how to re-order the display objects, particularly as they pass each other.